How to Pull the Perfect Espresso Shot Every Time
Master the art of espresso extraction. Learn the steps to pull a consistently perfect shot with rich crema and balanced flavor.
Master the art of espresso extraction. Learn the steps to pull a consistently perfect shot with rich crema and balanced flavor.
How to Pull the Perfect Espresso Shot Every Time
Ever wondered how those baristas at your favorite coffee shop consistently pull perfect espresso shots? It's not magic, it's science, practice, and a bit of art! Pulling a truly great espresso shot at home is one of the most rewarding aspects of being a home barista. It's the foundation for so many delicious coffee drinks, from lattes and cappuccinos to Americanos. But let's be honest, it can also be one of the most frustrating. Too fast, too slow, too bitter, too sour – there are so many variables. Don't worry, we're here to break it all down for you. This comprehensive guide will walk you through every step, from bean selection to dialing in your grinder, ensuring you can consistently pull rich, balanced, and crema-laden espresso shots right in your own kitchen.
Understanding the Espresso Fundamentals The Golden Rules of Extraction
Before we dive into the nitty-gritty, let's understand what makes a great espresso shot. It's all about extraction – pulling the right amount of flavor compounds from the coffee grounds. Under-extracted shots taste sour, weak, and watery, often lacking crema. Over-extracted shots taste bitter, harsh, and burnt. The goal is a balanced extraction, hitting that sweet spot of sweetness, acidity, and bitterness, with a beautiful, thick crema on top.
The Four Key Variables for Perfect Espresso
- Dose: How much coffee grounds you use.
- Grind Size: The fineness or coarseness of your coffee grounds.
- Tamp: How evenly and firmly you compress the coffee grounds in the portafilter.
- Yield: The amount of liquid espresso produced.
- Time: The duration of the extraction.
- Temperature: The water temperature during brewing.
- Pressure: The pressure applied by the machine during extraction.
These variables are interconnected. Change one, and you'll likely need to adjust others. This is what we call 'dialing in' your espresso.
Essential Equipment for Espresso Perfection Your Home Barista Toolkit
You can't pull a great shot without the right tools. While you don't need the most expensive setup, investing in quality equipment will significantly improve your results and consistency.
Espresso Machine Recommendations for Home Baristas
Your espresso machine is the heart of your setup. Here are a few recommendations across different price points, suitable for various skill levels and budgets:
Beginner Friendly and Budget Conscious Espresso Machines
- DeLonghi Dedica Arte EC885M: This is a fantastic entry-level machine. It's compact, heats up quickly, and can produce surprisingly good espresso once you get the hang of it. It comes with a pressurized portafilter, which is more forgiving for beginners, but you can also upgrade to a non-pressurized basket later.
- Gaggia Classic Pro: A legendary machine for a reason. It's a step up in price and requires a bit more skill, but it's a workhorse that can last for years. It offers excellent temperature stability for its class and a powerful steam wand for milk frothing. It's highly moddable too, if you ever want to dive deeper.
Mid-Range and Enthusiast Level Espresso Machines
- Breville Barista Express Impress: This all-in-one machine is incredibly popular for its convenience. It has an integrated grinder with intelligent dosing and assisted tamping, making the process much easier for those who want consistency without too much fuss. It's a great choice for busy mornings.
- Rancilio Silvia: Another classic, known for its robust build quality and excellent steam power. Like the Gaggia Classic Pro, it's a single boiler machine, meaning you'll need to temperature surf for optimal espresso and steaming, but it's a reliable performer that can produce excellent results.
High-End and Prosumer Espresso Machines
- Profitec GO: A single boiler machine with PID temperature control, offering precise temperature stability for consistent shots. It's compact, well-built, and a great entry into the prosumer world without breaking the bank.
- ECM Classika PID: Similar to the Profitec GO, this is another excellent single boiler machine with PID. ECM is known for its beautiful aesthetics and high-quality components. It's a joy to use and produces fantastic espresso.
The Importance of a Quality Coffee Grinder for Espresso
This cannot be stressed enough: your grinder is more important than your espresso machine for shot quality. A cheap grinder will produce inconsistent particle sizes, leading to uneven extraction, no matter how good your machine is. You need a burr grinder (not blade!) that can produce a very fine, consistent grind.
Recommended Espresso Grinders
- Baratza Encore ESP: A fantastic entry-level electric burr grinder specifically designed for espresso. It offers a wide range of grind settings and good consistency for its price point.
- Eureka Mignon Notte/Manuale: These are excellent value-for-money espresso-focused grinders. They are stepless, meaning you have infinite adjustment points for dialing in, and they produce very consistent grinds.
- Niche Zero: A highly popular single-dose grinder known for its exceptional grind quality and minimal retention. If you frequently switch beans or want absolute precision, this is a top choice.
- Fellow Ode Brew Grinder Gen 2 (with espresso burrs): While primarily a brew grinder, with the right burrs (like the SSP MP or SSP Cast), it can be adapted for espresso, offering incredible clarity and consistency.
Other Essential Espresso Accessories
- Precision Scale: Absolutely crucial for consistent dosing and yield. Look for one that measures to 0.1g.
- Tamper: A good quality, heavy tamper that fits your portafilter basket perfectly.
- Distribution Tool (WDT Tool): Helps break up clumps and distribute grounds evenly in the portafilter, preventing channeling.
- Knock Box: For easily disposing of spent coffee pucks.
- Milk Pitcher: If you plan on making milk-based drinks.
- Thermometer (for milk): Helps achieve the perfect milk temperature.
- Cleaning Supplies: Backflush detergent, group head brush, microfiber cloths.
Step-by-Step Guide to Pulling the Perfect Espresso Shot The Workflow
Now, let's get to the actual process. Consistency is key, so try to follow these steps precisely every time.
Step 1 Prepare Your Espresso Machine and Portafilter
Warm-up: Turn on your espresso machine at least 20-30 minutes before you plan to brew. This allows the group head, portafilter, and internal components to reach a stable brewing temperature. A cold machine will result in under-extracted, sour shots.
Flush the Group Head: Before inserting the portafilter, do a quick flush (a 'purge' or 'blank shot') of the group head. This clears any old coffee grounds, heats the group head further, and ensures fresh, hot water for your shot.
Clean and Dry Portafilter: Ensure your portafilter basket is clean and dry. Any old grounds or moisture can affect extraction.
Step 2 Dose Your Coffee Beans Precision is Key
Weigh Your Beans: This is where your precision scale comes in. Weigh out your whole coffee beans before grinding. A common starting point for a double shot is 18-20 grams, but this can vary based on your basket size and desired strength. Consistency in dose is critical.
Grind Your Beans: Grind your weighed beans directly into your portafilter basket. For espresso, you need a very fine grind, similar to powdered sugar or flour, but not so fine that it clumps excessively. It should feel slightly gritty between your fingers.
Step 3 Distribute and Tamp for Even Extraction
Distribute the Grounds: This is a crucial step often overlooked. Uneven distribution leads to 'channeling,' where water finds paths of least resistance through the coffee bed, resulting in uneven extraction. Use a WDT (Weiss Distribution Technique) tool to break up clumps and evenly distribute the grounds. Stir the grounds thoroughly in the basket, then gently tap the portafilter on your counter to settle them.
Tamp Evenly: Place your portafilter on a level surface. Hold the tamper like a doorknob and apply firm, even pressure straight down. The goal is to create a perfectly level and compact coffee puck. Don't twist or polish the puck; just one firm, even tamp is sufficient. The pressure isn't as important as the consistency and levelness.
Wipe the Rim: After tamping, wipe any loose coffee grounds from the rim of the portafilter. This ensures a clean seal with the group head.
Step 4 Insert Portafilter and Start Extraction The Moment of Truth
Insert Portafilter: Immediately insert the portafilter into the group head and lock it into place. Don't delay, as the hot group head will start to heat the coffee puck, potentially leading to an uneven extraction.
Start Extraction and Timer: Place your pre-warmed espresso cup (or cups) on a scale under the portafilter. Start the extraction and simultaneously start a timer. You're looking for a specific yield (output weight) in a specific time frame.
Step 5 Monitor and Adjust The Dialing In Process
Observe the Flow: A good espresso shot should start with a few drops, then flow like warm honey or a mouse's tail. It should be a steady, consistent stream. Look for a rich, reddish-brown crema forming on top.
Target Parameters: For a double shot (18-20g in), a common starting point for yield is 36-40g out (a 1:2 brew ratio). The ideal extraction time for this yield is typically between 25-30 seconds. These are guidelines, not strict rules, but they are excellent starting points.
Troubleshooting Your Espresso Shot Common Issues and Solutions
This is where the 'dialing in' comes in. Your first shot probably won't be perfect. Here's how to adjust:
- Shot Runs Too Fast (Under 20 seconds):
- Problem: Under-extracted, sour, watery, thin crema.
- Solution: Grind finer. This increases resistance, slowing down the flow. You might also need to increase your dose slightly.
- Shot Runs Too Slow (Over 35 seconds) or Chokes:
- Problem: Over-extracted, bitter, burnt, very dark crema, or no flow at all.
- Solution: Grind coarser. This decreases resistance, speeding up the flow. You might also need to decrease your dose slightly.
- Uneven Flow or Spraying (Channeling):
- Problem: Water finds easy paths through the coffee bed, leading to uneven extraction.
- Solution: Improve your distribution (WDT tool is highly recommended) and tamping technique. Ensure your tamp is perfectly level.
- Lack of Crema or Thin Crema:
- Problem: Old beans, under-extraction, or low brewing temperature.
- Solution: Use freshly roasted beans (within 2-4 weeks of roast date). Grind finer. Ensure your machine is fully warmed up.
- Too Bitter:
- Problem: Over-extraction, too high temperature, or too fine a grind.
- Solution: Grind coarser, reduce dose slightly, or check machine temperature.
- Too Sour:
- Problem: Under-extraction, too low temperature, or too coarse a grind.
- Solution: Grind finer, increase dose slightly, or ensure machine is fully warmed up.
Step 6 Clean Up Your Espresso Station
Knock Out the Puck: Immediately after extraction, remove the portafilter and knock out the spent coffee puck into your knock box. A well-extracted puck should be firm and relatively dry.
Wipe Down: Wipe the group head screen with a damp cloth to remove any residual coffee grounds. This prevents clogging and ensures clean water flow for your next shot.
Rinse Portafilter: Rinse the portafilter under hot water. For daily cleaning, a quick rinse is fine. For deeper cleaning, use a backflush detergent regularly (check your machine's manual for frequency).
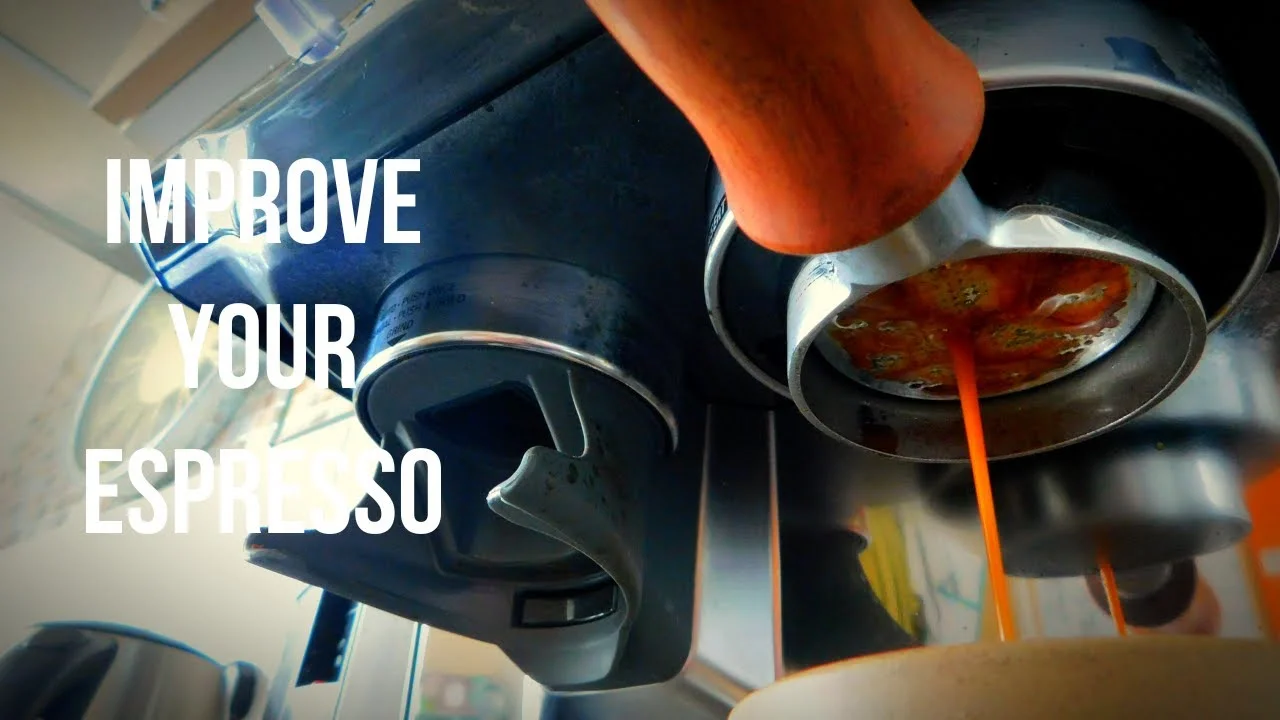
Advanced Tips for Espresso Mastery Elevating Your Game
Once you've mastered the basics, here are some ways to further refine your espresso skills:
Understanding Brew Ratios and Their Impact on Flavor
The brew ratio is the ratio of your dry coffee dose to your liquid espresso yield. Common ratios include:
- Ristretto (1:1 to 1:1.5): Very concentrated, intense, often sweeter with less bitterness. Shorter extraction time.
- Espresso (1:2 to 1:2.5): The standard, balanced shot.
- Lungo (1:3 or higher): Longer extraction, more diluted, can be more bitter.
Experiment with different ratios to find what you prefer for different beans. A lighter roast might shine at a 1:2.5 ratio, while a darker roast might be better at 1:1.8.
Pre-Infusion and Its Benefits for Espresso Extraction
Many espresso machines offer a pre-infusion feature, where a small amount of water is introduced to the coffee puck at low pressure before the full brewing pressure kicks in. This gently saturates the coffee grounds, helping to reduce channeling and promote a more even extraction. If your machine has it, experiment with different pre-infusion times (e.g., 3-7 seconds) to see how it affects your shot.
Temperature Surfing and PID Control for Consistency
For single boiler machines (like the Gaggia Classic Pro or Rancilio Silvia), temperature surfing involves manipulating the boiler's heating cycle to hit the optimal brewing temperature. It takes practice but can significantly improve consistency. Machines with PID (Proportional-Integral-Derivative) controllers offer precise digital temperature control, making this much easier and more consistent.
The Role of Water Quality in Espresso Taste
Water makes up over 90% of your espresso, so its quality is paramount. Hard water can lead to scale buildup in your machine and dull flavors. Soft water can lead to sourness. Ideally, you want filtered water with a balanced mineral content. Consider using a water filter pitcher (like Brita or ZeroWater) or even specific espresso machine water filters.
Common Mistakes to Avoid When Pulling Espresso Shots
Even experienced baristas make mistakes. Here are some common pitfalls to watch out for:
- Using Stale Coffee Beans: This is probably the biggest culprit for bad espresso. Coffee beans degas and lose flavor rapidly after roasting. Aim to use beans within 2-4 weeks of their roast date.
- Inconsistent Grinding: As mentioned, a poor grinder or inconsistent grind size will ruin your shot.
- Uneven Distribution and Tamping: These lead to channeling and uneven extraction. Take your time with these steps.
- Not Warming Up Your Machine: A cold machine means cold water hitting hot coffee, leading to under-extraction.
- Not Weighing Your Dose and Yield: Guessing leads to inconsistency. Use a scale!
- Over-Tamping or Under-Tamping: While pressure isn't as critical as evenness, extreme over-tamping can compact the puck too much, and under-tamping won't create enough resistance. Focus on firm and level.
- Ignoring the Taste: Your taste buds are your ultimate guide. If it tastes bad, adjust!
Enjoying Your Perfect Espresso Shot The Reward
Once you've pulled that beautiful, golden-brown shot with a thick, tiger-striped crema, take a moment to appreciate it. Sip it neat to truly taste the nuances of the coffee, or use it as the base for your favorite milk-based drinks. Remember, practice makes perfect. Don't get discouraged if your first few shots aren't masterpieces. Every shot is a learning opportunity. Keep experimenting with your grind, dose, and technique, and soon you'll be consistently pulling perfect espresso shots that rival your favorite coffee shop. Happy brewing!
:max_bytes(150000):strip_icc()/277019-baked-pork-chops-with-cream-of-mushroom-soup-DDMFS-beauty-4x3-BG-7505-5762b731cf30447d9cbbbbbf387beafa.jpg)