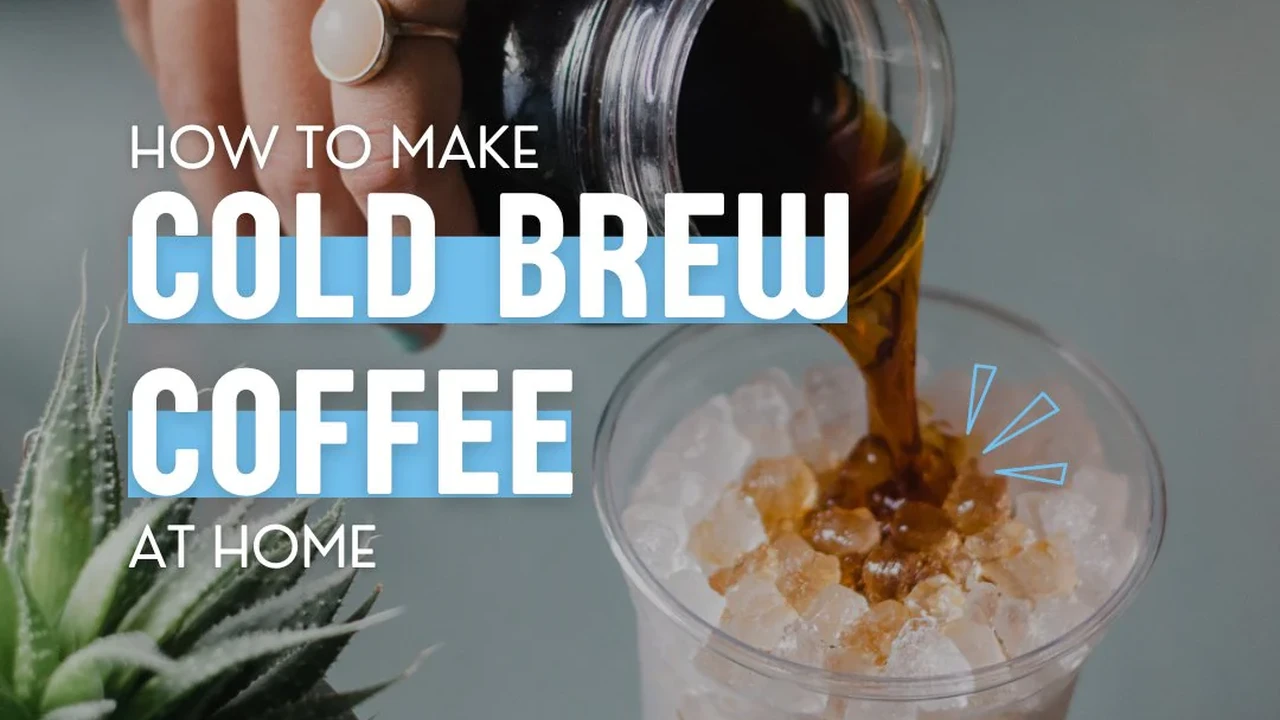
How to Brew Perfect Cold Brew Coffee at Home
Learn the secrets to making delicious cold brew coffee. Get tips on ratios, steeping times, and storage for a smooth concentrate.
Learn the secrets to making delicious cold brew coffee. Get tips on ratios, steeping times, and storage for a smooth concentrate.
How to Brew Perfect Cold Brew Coffee at Home
Unlocking the Magic of Cold Brew Coffee Benefits and Basics
Cold brew coffee has exploded in popularity over the last decade, and for good reason. It’s not just a chilled version of your regular hot coffee; it’s an entirely different beast. Unlike traditional brewing methods that use hot water to extract flavor, cold brew relies on time and cold water. This gentle, slow extraction process results in a coffee concentrate that is incredibly smooth, naturally sweet, and significantly less acidic than its hot-brewed counterpart. If you’ve ever experienced an upset stomach from regular coffee, cold brew might be your new best friend. Its lower acidity makes it much easier on the digestive system.
Beyond the health benefits, cold brew offers unparalleled versatility. You can enjoy it straight, dilute it with water or milk, or use it as a base for countless coffee cocktails and recipes. It’s also incredibly convenient. Once you’ve made a batch, it stays fresh in the refrigerator for up to two weeks, meaning you can have delicious coffee on demand without the daily hassle of brewing. This makes it perfect for busy mornings or for entertaining guests.
The basic principle is simple: coarse-ground coffee steeped in cold water for an extended period. The exact ratio, steeping time, and type of coffee can all be adjusted to suit your personal taste, making cold brew a highly customizable beverage. Let’s dive into the specifics of how to make this delightful drink right in your own kitchen.
Essential Gear for Home Cold Brew Coffee Making Equipment You Need
One of the great things about cold brew is that you don't need a lot of fancy equipment to get started. Most of what you need you probably already have in your kitchen. However, having the right tools can make the process smoother and the results more consistent.
Grinder Considerations for Cold Brew Coffee
A good grinder is perhaps the most crucial piece of equipment for any coffee enthusiast, and cold brew is no exception. For cold brew, you need a coarse, uniform grind. Think of it like breadcrumbs or sea salt. If your grind is too fine, you’ll end up with over-extracted, bitter coffee and a lot of sediment. A burr grinder is highly recommended over a blade grinder because it grinds coffee beans uniformly, ensuring consistent extraction. Blade grinders chop the beans unevenly, creating a mix of fine particles and coarse chunks, which leads to inconsistent flavor.
- Baratza Encore Conical Burr Coffee Grinder: This is a fantastic entry-level burr grinder, widely recommended for its consistency and durability. It offers 40 grind settings, making it versatile enough for everything from French press to espresso, and it excels at producing the coarse grind needed for cold brew. It’s a workhorse that will last for years. Price: Around $170.
- Capresso Infinity Conical Burr Grinder: Another excellent option for home use, the Capresso Infinity provides a wide range of grind settings and a slow grinding speed that minimizes heat buildup, preserving the coffee's aroma and flavor. It’s known for its quiet operation and consistent grind. Price: Around $100.
- Hario Skerton Pro Ceramic Coffee Mill: If you're on a budget or prefer manual grinding, this is a solid choice. It produces a surprisingly consistent coarse grind for a manual grinder, and it's portable. Just be prepared for a bit of an arm workout if you're making large batches. Price: Around $50.
Steeping Vessels for Cold Brew Coffee
You need a container to steep your coffee in. This can be as simple as a large jar or a dedicated cold brew maker.
- Large Mason Jars or Pitchers: For beginners, a simple 64-ounce (half-gallon) or 1-gallon Mason jar works perfectly. They are inexpensive, readily available, and easy to clean. Just make sure you have a lid.
- Takeya Patented Deluxe Cold Brew Coffee Maker: This is a popular and highly-rated dedicated cold brew maker. It features a durable, BPA-free Tritan pitcher with an airtight lid and a fine-mesh coffee filter that keeps grounds out of your concentrate. It’s incredibly easy to use and clean. Available in 1-quart and 2-quart sizes. Price: Around $25-$35.
- OXO Good Grips Cold Brew Coffee Maker: A more premium option, the OXO cold brew maker is designed for convenience. It has a rainmaker lid that distributes water evenly over the grounds, and a simple release switch for draining the concentrate. It’s easy to clean and produces excellent results. Price: Around $50.
Filtering Tools for Cold Brew Coffee
After steeping, you'll need to separate the coffee grounds from the liquid concentrate. This is where your filtering tools come in.
- Fine Mesh Strainer: This is your first line of defense. Use it to remove the bulk of the coffee grounds.
- Cheesecloth or Nut Milk Bag: For a cleaner concentrate, line your fine mesh strainer with a few layers of cheesecloth or use a dedicated nut milk bag. These are excellent for catching smaller particles.
- Paper Coffee Filters (Cone or Basket): For the clearest, sediment-free cold brew, you can do a secondary filtration through a standard paper coffee filter (like those used in drip coffee makers) placed in a funnel or a pour-over cone. This step is optional but highly recommended for a super smooth finish.
The Perfect Cold Brew Coffee Ratio and Ingredients
The beauty of cold brew lies in its flexibility, but starting with a good base ratio is key. The most common and recommended coffee-to-water ratio for cold brew concentrate is 1:8 by weight. This means for every 1 gram of coffee, you use 8 grams of water. If you prefer to measure by volume, a good starting point is 1 cup of coffee grounds to 4 cups of water. Remember, this makes a concentrate, which you'll dilute later.
Choosing Your Coffee Beans for Cold Brew
While you can technically use any coffee beans for cold brew, some types will yield better results. Since cold brewing extracts fewer acids and bitterness, you can often get away with darker roasts that might be too intense for hot brewing. However, medium to dark roasts generally work best, offering a rich, chocolatey, and nutty flavor profile that shines in cold brew.
- Origin: Brazilian, Colombian, or Sumatran beans often produce excellent cold brew due to their inherent chocolatey, low-acid, and full-bodied characteristics.
- Roast Level: Medium to dark roasts are typically preferred. A medium roast will give you a balanced flavor, while a dark roast will yield a bolder, richer concentrate. Avoid very light roasts, as their delicate, acidic notes might not translate well in cold brew.
- Freshness: Always use fresh, whole beans and grind them just before brewing. This is paramount for flavor. Stale beans will result in flat, lifeless cold brew.
Water Quality for Cold Brew Coffee
Water makes up over 98% of your coffee, so its quality significantly impacts the final taste. Avoid tap water if it has a strong chlorine taste or is very hard. Filtered water is always the best choice.
- Filtered Water: Use filtered water from a Brita pitcher, a refrigerator dispenser, or a dedicated water filter. This removes impurities and off-flavors that can detract from your coffee.
- Spring Water: Bottled spring water can also be a good option if your tap water quality is poor.
Step by Step Cold Brew Coffee Brewing Process
Now that you have your ingredients and equipment ready, let's walk through the simple steps to make perfect cold brew coffee at home.
Step 1 Grinding Your Coffee Beans for Cold Brew
Measure out your coffee beans according to your desired ratio. For a 1:8 ratio, if you want to make a 32-ounce (about 946ml) batch of concentrate, you'll need approximately 118 grams of coffee (32 oz * 29.57 ml/oz = 946 ml; 946g water / 8 = 118g coffee). Grind your coffee beans to a coarse consistency. It should look like coarse sea salt or breadcrumbs. If it's too fine, your cold brew will be cloudy and potentially bitter. If it's too coarse, you might have under-extracted coffee.
Step 2 Combining Coffee and Water for Cold Brew
Place your coarse-ground coffee into your steeping vessel (Mason jar, pitcher, or dedicated cold brew maker). Slowly pour the cold, filtered water over the coffee grounds. Make sure all the grounds are saturated. You might need to gently stir the mixture with a spoon to ensure even saturation and prevent dry pockets of coffee. This is crucial for proper extraction.
Step 3 Steeping Your Cold Brew Coffee
Once the coffee and water are combined, cover the vessel with a lid. Place it in the refrigerator and let it steep for 12 to 24 hours. The ideal steeping time depends on your desired strength and the specific coffee beans you're using. Generally, 12-18 hours is a good starting point. If you prefer a stronger concentrate, go for 20-24 hours. Avoid steeping for much longer than 24 hours, as it can lead to over-extraction and a slightly bitter taste, even with cold brew.
Step 4 Filtering Your Cold Brew Concentrate
After the steeping time is complete, it's time to separate the concentrate from the grounds. Place a fine mesh strainer over a large bowl or another clean pitcher. Pour the coffee mixture through the strainer to remove the large coffee grounds. Discard the spent grounds.
For an even cleaner, sediment-free concentrate, perform a second filtration. Line your fine mesh strainer with a few layers of cheesecloth, a nut milk bag, or a paper coffee filter (placed in a funnel or pour-over cone). Slowly pour the strained cold brew through this secondary filter. This step might take some time, as the liquid will drip slowly, but it's worth it for a super smooth result.
Step 5 Storing Your Cold Brew Concentrate
Once filtered, transfer your cold brew concentrate to an airtight container, such as a glass bottle or jar. Store it in the refrigerator. Properly stored, cold brew concentrate can last for up to 1 to 2 weeks. The flavor might mellow slightly over time, but it will remain delicious.
Diluting and Serving Your Homemade Cold Brew Coffee
Your cold brew is a concentrate, meaning it's much stronger than regular coffee. You'll need to dilute it before drinking. The most common dilution ratio is 1:1 with water or milk, but this is entirely up to your personal preference.
- Classic Cold Brew: Mix equal parts cold brew concentrate and cold water. Add ice and enjoy.
- Creamy Cold Brew: Mix equal parts cold brew concentrate and your favorite milk (dairy, almond, oat, soy). Add ice.
- Sweetened Cold Brew: Add a splash of simple syrup, vanilla syrup, or a sweetener of your choice to your diluted cold brew.
- Cold Brew Latte: For a richer experience, use less water and more milk, or even frothed milk (cold or hot) for a cold brew latte.
- Cold Brew Cocktails: Use your concentrate as a base for espresso martinis, coffee old fashioneds, or other creative coffee cocktails.
Experiment with different dilution ratios until you find what you like best. Some people prefer a 1:2 ratio (1 part concentrate to 2 parts water/milk) for a lighter drink, while others might go for a 2:1 ratio for an extra strong kick.
Troubleshooting Common Cold Brew Coffee Issues
Even though cold brew is relatively forgiving, you might encounter a few common issues. Here’s how to fix them:
My Cold Brew Tastes Too Bitter or Strong
This usually indicates over-extraction. The most common culprits are:
- Grind is too fine: A finer grind exposes more surface area to water, leading to faster extraction. Ensure your coffee is coarsely ground.
- Steeping time is too long: Reduce your steeping time. Try 12-16 hours instead of 24.
- Coffee-to-water ratio is too high: You might be using too much coffee for the amount of water. Adjust your ratio to be less concentrated (e.g., 1:9 or 1:10).
My Cold Brew Tastes Weak or Watery
This is a sign of under-extraction:
- Grind is too coarse: If the grind is too coarse, the water can't extract enough flavor. Try a slightly finer grind (but still coarse!).
- Steeping time is too short: Extend your steeping time. Go for 20-24 hours.
- Coffee-to-water ratio is too low: You might not be using enough coffee. Increase your coffee amount to make a stronger concentrate (e.g., 1:7 or 1:6).
- Insufficient saturation: Make sure all coffee grounds are fully saturated with water at the beginning of the steeping process. Stirring helps.
My Cold Brew is Cloudy or Has Sediment
This is a common issue, especially if you're not using a dedicated cold brew maker with a built-in filter:
- Grind is too fine: Again, a fine grind produces more tiny particles that can pass through filters.
- Insufficient filtration: You need to filter your cold brew more thoroughly. Use multiple layers of cheesecloth, a nut milk bag, or perform a secondary filtration with a paper coffee filter.
- Agitation during steeping: Avoid shaking or stirring the cold brew during the steeping process, as this can break down grounds and create more sediment.
Advanced Cold Brew Coffee Tips and Tricks
Once you've mastered the basics, you can start experimenting to fine-tune your cold brew experience.
Experimenting with Coffee Beans and Roasts for Cold Brew
Don't be afraid to try different single-origin beans or blends. While medium to dark roasts are generally recommended, some lighter roasts can produce surprisingly fruity and vibrant cold brews. Pay attention to the tasting notes provided by the roaster and consider how they might translate in a low-acid environment.
Infusing Flavors into Your Cold Brew Coffee
Cold brew is an excellent canvas for flavor infusions. You can add ingredients directly to the steeping vessel along with your coffee grounds:
- Spices: Cinnamon sticks, cardamom pods, star anise, or a pinch of nutmeg can add warmth and complexity.
- Citrus Zest: A few strips of orange or lemon zest can brighten up your cold brew.
- Vanilla: A vanilla bean pod (split lengthwise) or a splash of pure vanilla extract (added after brewing) can provide a lovely sweetness.
- Cocoa Nibs: For a chocolatey cold brew, add a tablespoon or two of cocoa nibs to the steeping process.
Remember to start with small amounts and adjust to taste, as flavors can become quite concentrated during the long steeping process.
Making Nitro Cold Brew at Home
For the ultimate creamy, cascading cold brew experience, you can try making nitro cold brew at home. This requires a special setup, typically a mini-keg or a whipped cream dispenser with nitrogen cartridges. The nitrogen infusion creates a velvety texture and a beautiful foamy head, similar to a stout beer. It's a more advanced technique but incredibly rewarding for serious cold brew enthusiasts.
Using Cold Brew Concentrate in Recipes
Beyond just drinking it, cold brew concentrate can be a fantastic ingredient in various recipes:
- Baking: Use it in cakes, brownies, or cookies for a subtle coffee flavor.
- Desserts: Drizzle it over ice cream, use it in tiramisu, or make coffee-flavored panna cotta.
- Marinades: A splash of cold brew can add depth to meat marinades.
- Smoothies: Add a shot to your morning smoothie for an extra caffeine kick and rich flavor.
Making cold brew coffee at home is a rewarding and straightforward process that yields delicious, low-acid coffee concentrate. With a few basic tools and a little patience, you can enjoy café-quality cold brew whenever you desire. Experiment with different beans, ratios, and steeping times to discover your perfect cup. Happy brewing!
:max_bytes(150000):strip_icc()/277019-baked-pork-chops-with-cream-of-mushroom-soup-DDMFS-beauty-4x3-BG-7505-5762b731cf30447d9cbbbbbf387beafa.jpg)