The Ultimate Guide to Coffee Roasting at Home
Explore the exciting world of home coffee roasting. Learn the basics of roasting beans for ultimate freshness and flavor control.
Explore the exciting world of home coffee roasting. Learn the basics of roasting beans for ultimate freshness and flavor control.
The Ultimate Guide to Coffee Roasting at Home
Why Roast Your Own Coffee Beans The Freshness Advantage
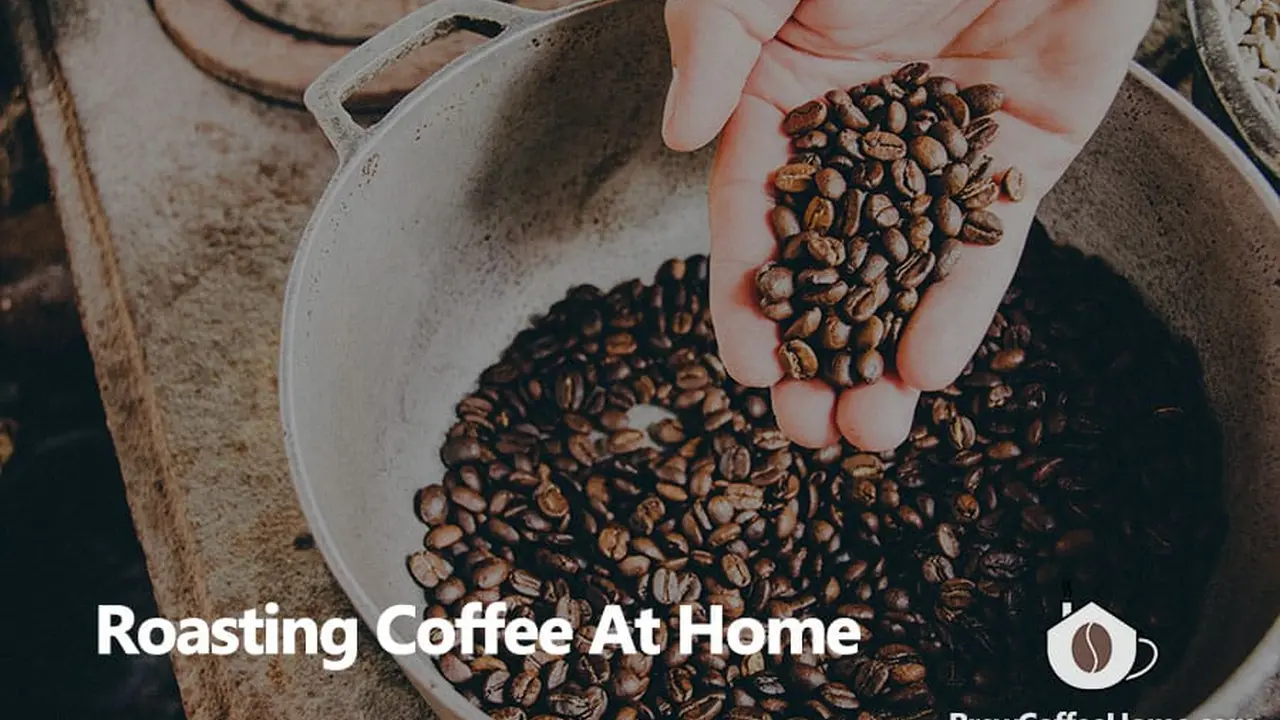
Have you ever wondered what truly fresh coffee tastes like? It's a revelation. Most coffee you buy, even from specialty shops, has already lost a significant portion of its aromatic compounds by the time it reaches your cup. Coffee beans are at their peak flavor within days, sometimes even hours, of being roasted. By roasting at home, you unlock an unparalleled level of freshness and flavor that simply isn't possible with pre-roasted beans. This isn't just about taste; it's about control. You dictate the roast level, bringing out specific notes and characteristics that appeal to your palate. Imagine a bright, fruity Ethiopian Yirgacheffe roasted perfectly to highlight its citrus notes, or a rich, chocolatey Brazilian bean taken to a medium-dark roast for a bold espresso. Home roasting puts you in the driver's seat of your coffee experience.
Beyond freshness, there's the economic benefit. Green coffee beans are significantly cheaper than roasted beans. While there's an initial investment in equipment, the long-term savings can be substantial, especially if you're a heavy coffee drinker. Plus, it's an incredibly rewarding hobby. There's a deep satisfaction in transforming raw, green beans into a fragrant, flavorful product ready for brewing. It connects you more intimately with your daily ritual and deepens your appreciation for the complexities of coffee.
Understanding Green Coffee Beans Sourcing and Storage
Before you can roast, you need green coffee beans. Sourcing high-quality green beans is crucial for a great end product. Look for reputable suppliers who provide information about the origin, varietal, processing method, and even the farm or cooperative. Some popular online retailers for home roasters include Sweet Maria's, Happy Mug Coffee, and Burman Coffee Traders. They often offer a wide selection from various regions like Ethiopia, Colombia, Brazil, Sumatra, and Central America, each with its unique flavor profile.
When selecting beans, consider their origin and how they might taste. For example, African beans often have fruity and floral notes, while South American beans tend to be more chocolatey and nutty. Experimentation is key here! Start with a few different origins to see what you enjoy roasting and drinking.
Once you have your green beans, proper storage is essential. Unlike roasted coffee, green beans are quite stable. Store them in a cool, dark, and dry place, ideally in an airtight container or a breathable bag that protects them from light and moisture. A pantry or cupboard is usually sufficient. Avoid extreme temperature fluctuations. Stored correctly, green coffee beans can maintain their quality for up to a year or even longer, though freshness is always best.
Essential Home Coffee Roasting Equipment Getting Started
You don't need to break the bank to start home roasting. There are several methods, ranging from very basic to more advanced. Here are some popular options and recommended products:
Air Popcorn Poppers The Budget Friendly Roaster
This is arguably the easiest and most affordable way to get into home roasting. You need an old-fashioned hot-air popcorn popper, not one with a stirring arm or oil. The hot air circulates the beans, providing a surprisingly even roast. Look for models with side vents for better airflow. They are quick, usually roasting a batch in 5-10 minutes.
- Recommended Product: Presto PopLite Hot Air Popper (often found used or new for around $20-$40).
- Usage Scenario: Perfect for beginners, small batches (around 60-80g), and experimenting with different beans.
- Pros: Inexpensive, fast, easy to clean.
- Cons: Small batch size, can be inconsistent, requires constant attention and stirring for evenness, chaff can fly everywhere.
Whirley Pop Stovetop Poppers Manual Control
The Whirley Pop is another popular entry-level option. It's a stovetop popcorn popper with a hand crank that stirs the beans, ensuring a more even roast than a popcorn popper. It gives you more control over the heat source.
- Recommended Product: Great Northern Popcorn Original Stainless Steel Stove Top Popcorn Popper (around $30-$50).
- Usage Scenario: Good for slightly larger batches (up to 200g), more control over roast profile, suitable for those who enjoy a hands-on approach.
- Pros: More even roast than air popper, larger batch size, durable.
- Cons: Requires constant stirring, can be smoky, still a manual process.
Dedicated Home Coffee Roasters Automated Precision
If you're serious about home roasting, a dedicated home roaster offers more control, consistency, and convenience. These machines are designed specifically for coffee and often feature temperature control, cooling cycles, and larger capacities.
- Recommended Product (Entry-Level): FreshRoast SR500 or SR700 (around $180-$250).
- Usage Scenario: Ideal for those ready to invest in a more consistent and controlled roasting experience. Great for experimenting with roast profiles.
- Pros: Excellent control over fan speed and heat, good consistency, built-in cooling cycle, relatively compact.
- Cons: Still relatively small batch size (around 120g), can be a bit noisy.
- Recommended Product (Mid-Range): Behmor 1600 Plus (around $350-$500).
- Usage Scenario: For those who want larger batch sizes (up to 1lb/450g) and more automated features. Great for regular roasting for a household.
- Pros: Larger capacity, smoke suppression, pre-programmed roast profiles, good for consistent results.
- Cons: Longer roast times, more complex to clean, higher price point.
- Recommended Product (Advanced): Aillio Bullet R1 (around $2,500-$3,000).
- Usage Scenario: For the serious enthusiast or small-scale commercial roaster. Offers unparalleled control, data logging, and consistency.
- Pros: Induction heating, precise temperature control, real-time data, large capacity, highly consistent.
- Cons: Very expensive, steep learning curve, large footprint.
Other Essential Tools for Roasting Success
- Heat-Resistant Bowl/Colander: For quickly cooling roasted beans.
- Timer: To track roast progression.
- Thermometer (Optional but Recommended): For monitoring bean temperature, especially with manual methods.
- Scale: To accurately measure green beans.
- Ventilation: Crucial! Roasting produces smoke and chaff. Roast near an open window, under a range hood, or even outdoors.
The Roasting Process From Green to Brown
Roasting coffee is a sensory experience. You'll rely on sight, sound, and smell to guide you. Here's a general overview of the stages:
Drying Phase Moisture Removal
When you first introduce green beans to heat, they will start to dry out. They'll change from a dull green to a pale yellow, then to a light tan. This phase is crucial for even heat distribution later on. You might smell a grassy or hay-like aroma. This phase typically lasts 4-8 minutes depending on your roaster and heat.
Yellowing and Browning Color Development
As the beans continue to absorb heat, they'll turn a progressively darker brown. The aroma will shift from grassy to more like toast or baking bread. The surface of the beans will become smoother. This is where the Maillard reaction begins, developing complex flavors.
First Crack The Sound of Flavor
This is a critical milestone! You'll hear distinct popping sounds, similar to popcorn. This is called 'First Crack.' It signifies that the internal pressure within the beans is building and releasing steam. At this point, the beans are expanding rapidly. First crack marks the beginning of light roasts. The aroma will become distinctly coffee-like.
Development Time Post First Crack
After first crack, the beans continue to develop flavor. The longer you roast past first crack, the darker the roast and the more pronounced the roast-derived flavors (like chocolate, caramel, smoky notes) become, while origin characteristics (fruity, floral) diminish. This period is often referred to as 'development time' and is crucial for achieving your desired roast profile.
Second Crack Darker Roasts
If you continue roasting, you'll hear a second, softer, more rapid series of crackling sounds. This is 'Second Crack.' It indicates that the cellular structure of the bean is breaking down further, and oils are migrating to the surface. Beans roasted to or past second crack are considered medium-dark to dark roasts. The aroma will become more intense and smoky.
Cooling Rapid Temperature Drop
Once you reach your desired roast level, you must cool the beans as quickly as possible to halt the roasting process. Spreading them out on a metal colander or baking sheet and stirring them, or using your roaster's cooling cycle, is essential. Rapid cooling prevents 'baking' and preserves the developed flavors.
Achieving Different Roast Levels Light Medium Dark
The beauty of home roasting is the ability to customize your roast level. Here's a general guide:
Light Roasts Bright and Aromatic
These roasts are typically dropped shortly after first crack finishes. The beans will be light brown, with a dry surface. They retain most of their origin characteristics, often exhibiting bright acidity, fruity, floral, or citrus notes. Examples include Cinnamon Roast or New England Roast. Great for pour-over or filter coffee.
Medium Roasts Balanced and Sweet
Medium roasts are taken further into the development phase, usually before or just at the very beginning of second crack. The beans will be medium brown, still mostly dry, but might show a hint of oil. They offer a balanced flavor profile, with sweetness, caramel, and chocolate notes emerging, while still retaining some origin character. Examples include City Roast or American Roast. Versatile for most brewing methods.
Medium Dark Roasts Bold and Rich
These roasts are taken into second crack, but not too far. The beans will be dark brown, with some visible oil on the surface. Origin characteristics are largely replaced by roast-derived flavors like dark chocolate, nutty, and smoky notes. Acidity is reduced. Examples include Full City Roast or Vienna Roast. Excellent for espresso or French press.
Dark Roasts Intense and Smoky
Dark roasts are taken well into second crack, sometimes even to the point where the beans are almost black and very oily. The flavors are dominated by roast notes, often smoky, bitter, and intense. Origin characteristics are almost entirely gone. Examples include French Roast or Italian Roast. Best for very strong coffee or specific espresso blends.
Troubleshooting Common Home Roasting Issues
Like any skill, home roasting has a learning curve. Don't get discouraged by imperfect roasts initially. Here are some common issues and how to address them:
Uneven Roasts Patchy Color
This often happens with air poppers or insufficient stirring. Ensure consistent airflow and agitation. For popcorn poppers, a wooden spoon can help stir the beans. For dedicated roasters, ensure you're not overloading the machine.
Scorching or Tipping Burnt Edges
This occurs when the heat is too high, especially at the beginning of the roast. The outside of the bean cooks too fast. Reduce your heat setting or preheat your roaster less. Ensure proper airflow to prevent hot spots.
Baking Flat Lifeless Flavor
Baking happens when the roast takes too long, often due to insufficient heat. The beans dry out but don't develop properly. Increase your heat or ensure your roaster is reaching adequate temperatures. Aim for a roast time of 8-15 minutes for most methods.
Too Smoky Excessive Smoke
Some smoke is normal, especially with darker roasts. However, excessive smoke can indicate scorching or that your beans are too dark. Ensure good ventilation. If using a Behmor, utilize its smoke suppression feature. If using a popcorn popper, consider roasting outdoors.
Chaff Management Messy Roasting
Chaff is the papery skin that comes off the beans during roasting. It's light and can fly everywhere. For air poppers, roast in a well-ventilated area or outdoors. Dedicated roasters usually have chaff collectors that need to be emptied regularly.
Post Roasting Care Degassing and Storage
Once your beans are roasted and cooled, they're not quite ready for brewing. Freshly roasted coffee undergoes a process called 'degassing,' where carbon dioxide is released. Brewing too soon can result in sour or underdeveloped flavors.
Allow your beans to rest for at least 12-24 hours, and ideally 2-5 days, before brewing. This allows the CO2 to escape and the flavors to mellow and develop. For espresso, a longer rest of 5-7 days is often recommended.
Store your roasted beans in an airtight container with a one-way valve (to allow CO2 to escape without letting oxygen in) in a cool, dark place. Avoid clear containers or direct sunlight. Do not store them in the refrigerator or freezer for daily use, as this can introduce moisture and freezer burn. Aim to consume your home-roasted coffee within 2-3 weeks for optimal freshness.
Experimentation and Enjoyment Your Roasting Journey
Home coffee roasting is a journey of continuous learning and discovery. Don't be afraid to experiment with different bean origins, roast levels, and roasting techniques. Keep a roasting log to track your parameters (bean type, batch size, roast time, temperature, first crack time, cooling time) and tasting notes. This will help you replicate successful roasts and learn from less successful ones.
Join online communities or forums dedicated to home roasting. There's a wealth of knowledge and experience to be shared. Most importantly, have fun with it! The satisfaction of brewing a cup of coffee from beans you roasted yourself is incredibly rewarding. It elevates your daily coffee ritual from a simple habit to a passionate craft. Enjoy the process, savor the aromas, and delight in the truly fresh, personalized coffee you create.
:max_bytes(150000):strip_icc()/277019-baked-pork-chops-with-cream-of-mushroom-soup-DDMFS-beauty-4x3-BG-7505-5762b731cf30447d9cbbbbbf387beafa.jpg)